3D Printing Design Rules
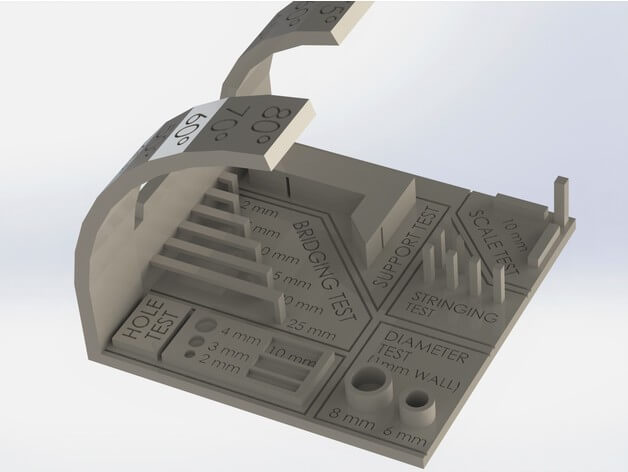
The goal of the group assignment of this week was testing the design rules of our current 3d printer: Makerbot Replicator 2x. So we download a 3d model from the web (3d printer test) ready to use because it is a ".STL" file.
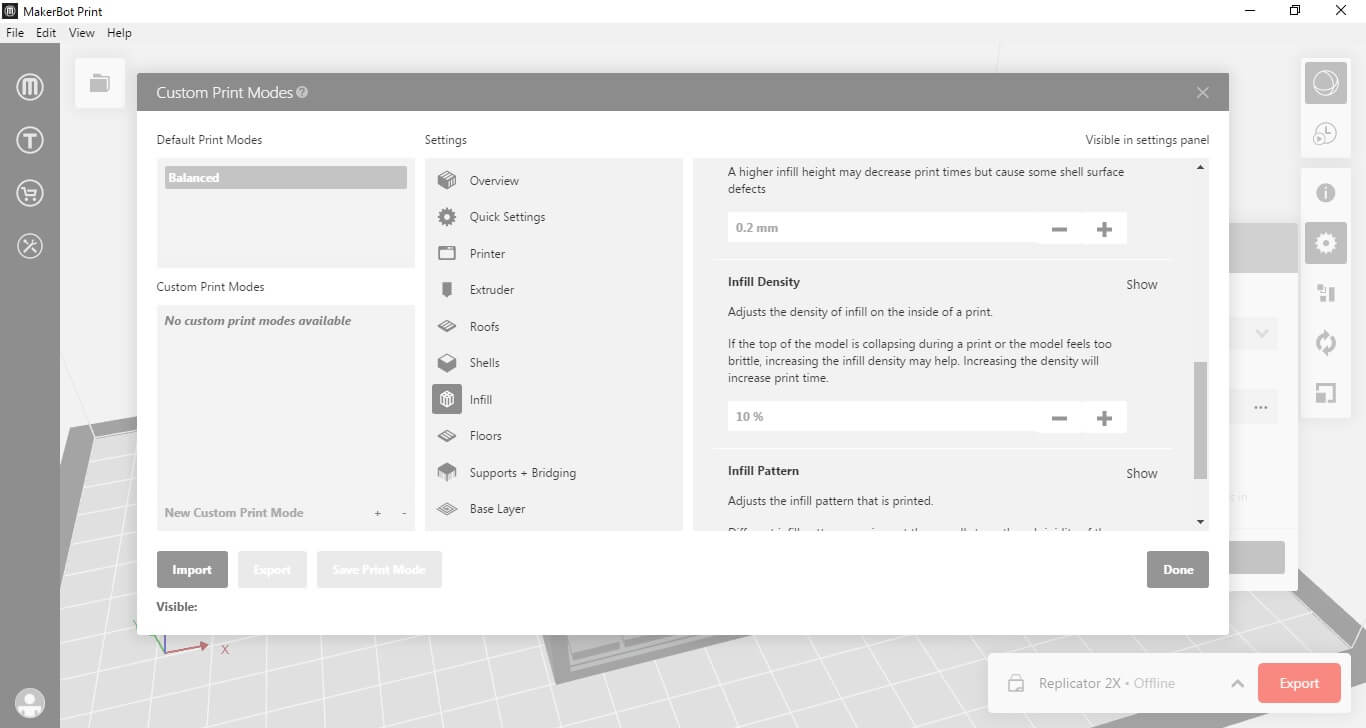
In the Makerbot Print software, first, load the ".STL" and then check some print features, like Infill Density: defines the amount of fill material, therefore, control the production time. We use 30%, i.e. the piece have only 30% of fill and 70% empty, and take about 2 hours. The rest of the features were left by default.
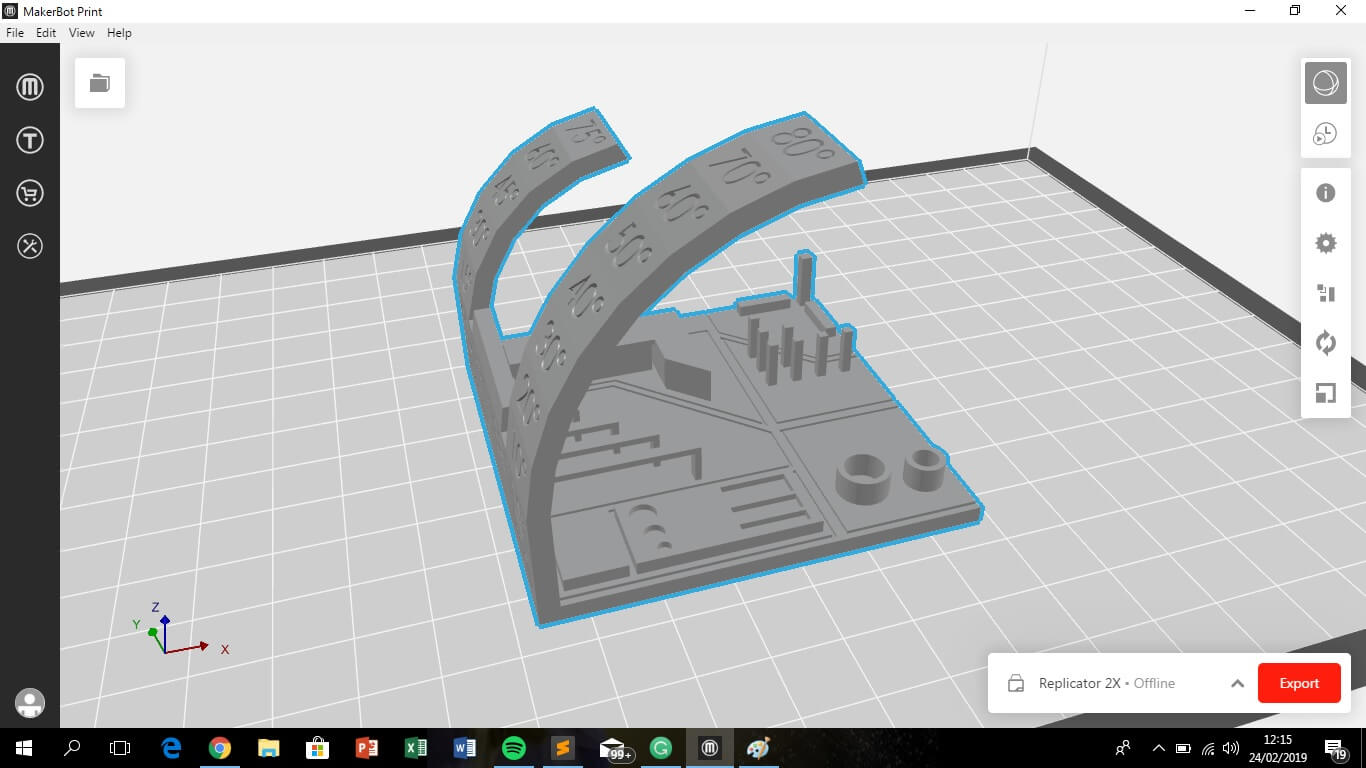
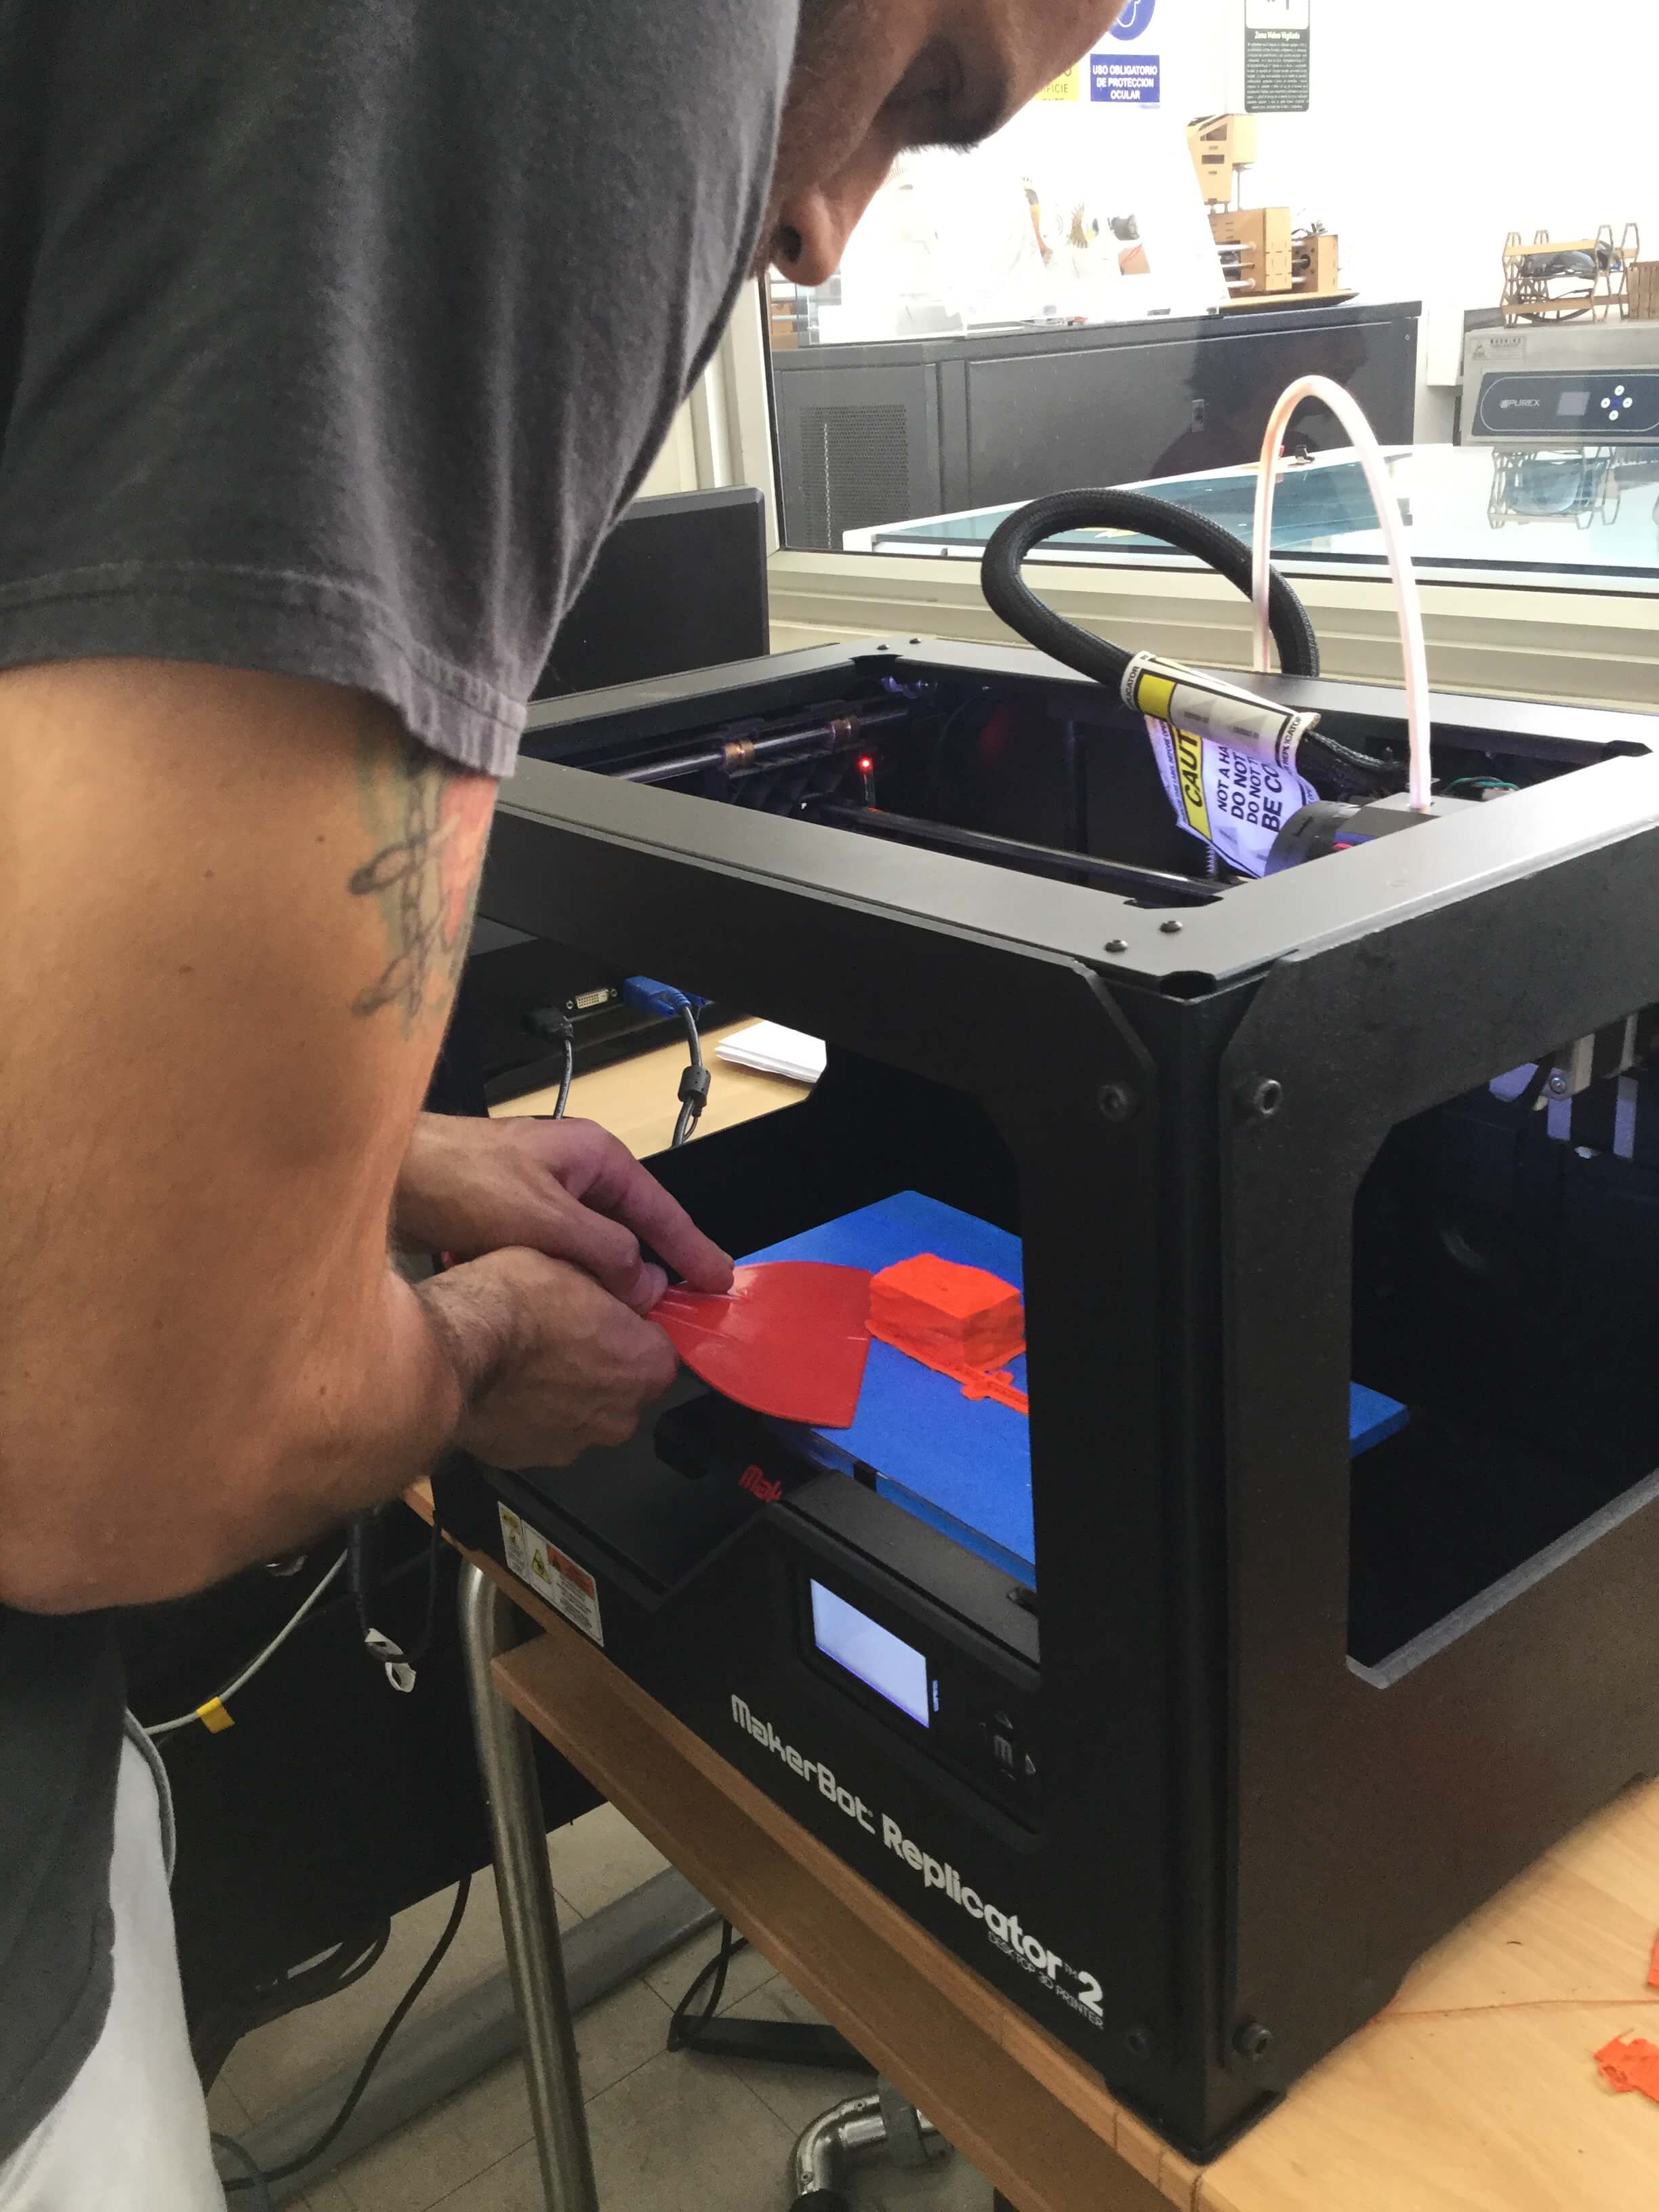
For set up the printer, the platform was adjusted looking to minimize the distance between the platform and the extruder (using a sheet of paper between the platform and the hot end). Then send the file to the printer and the extruder begins to heating about 200°C and then the print start. But the printer did not work, because the filament was stuck in the head, to unlock it, we followed the steps indicated on the display of the machine. Once this was solved, the file was sent back and printed.
.JPG)
.JPG)
.JPG)
.JPG)
Analyzing the test model, it seems that print well untill 40° inclination, then the layers are not uniform, but looks good the other tests.
Design and 3D print an object
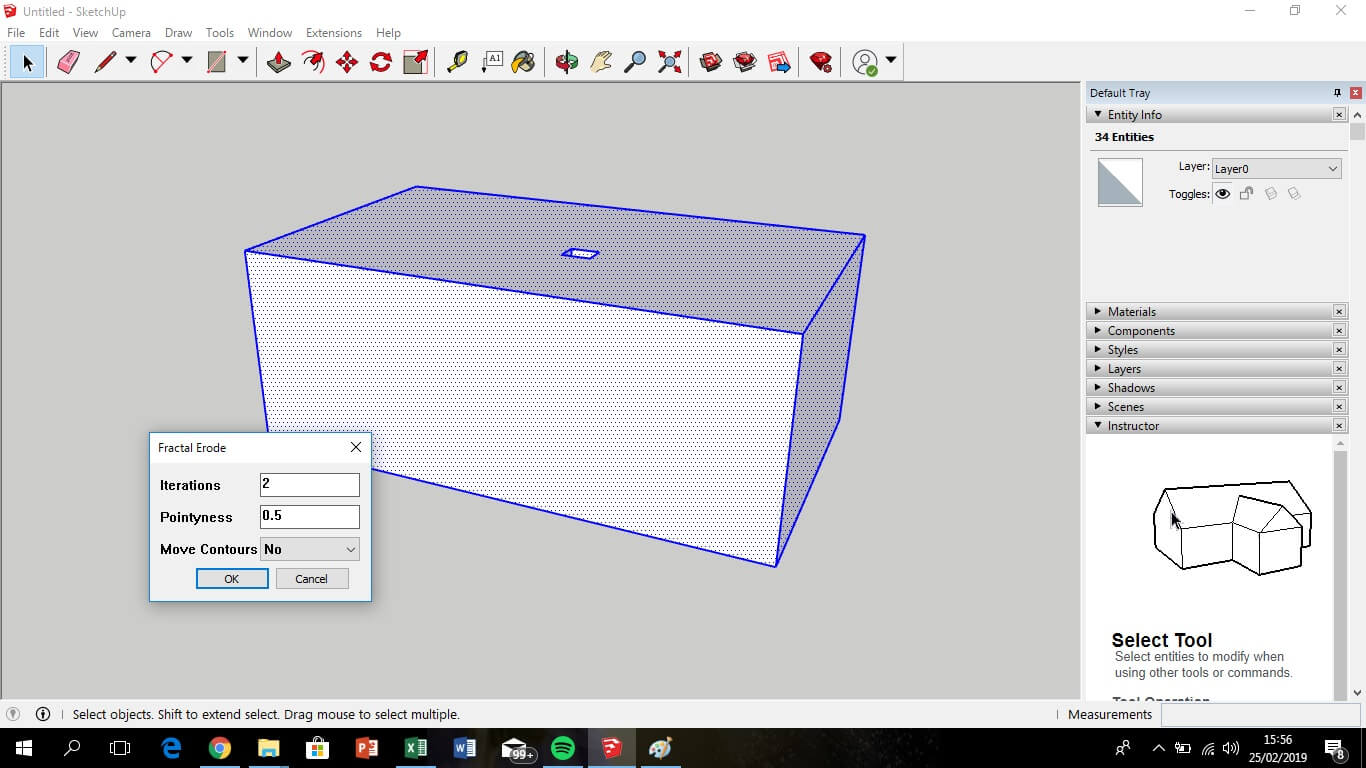
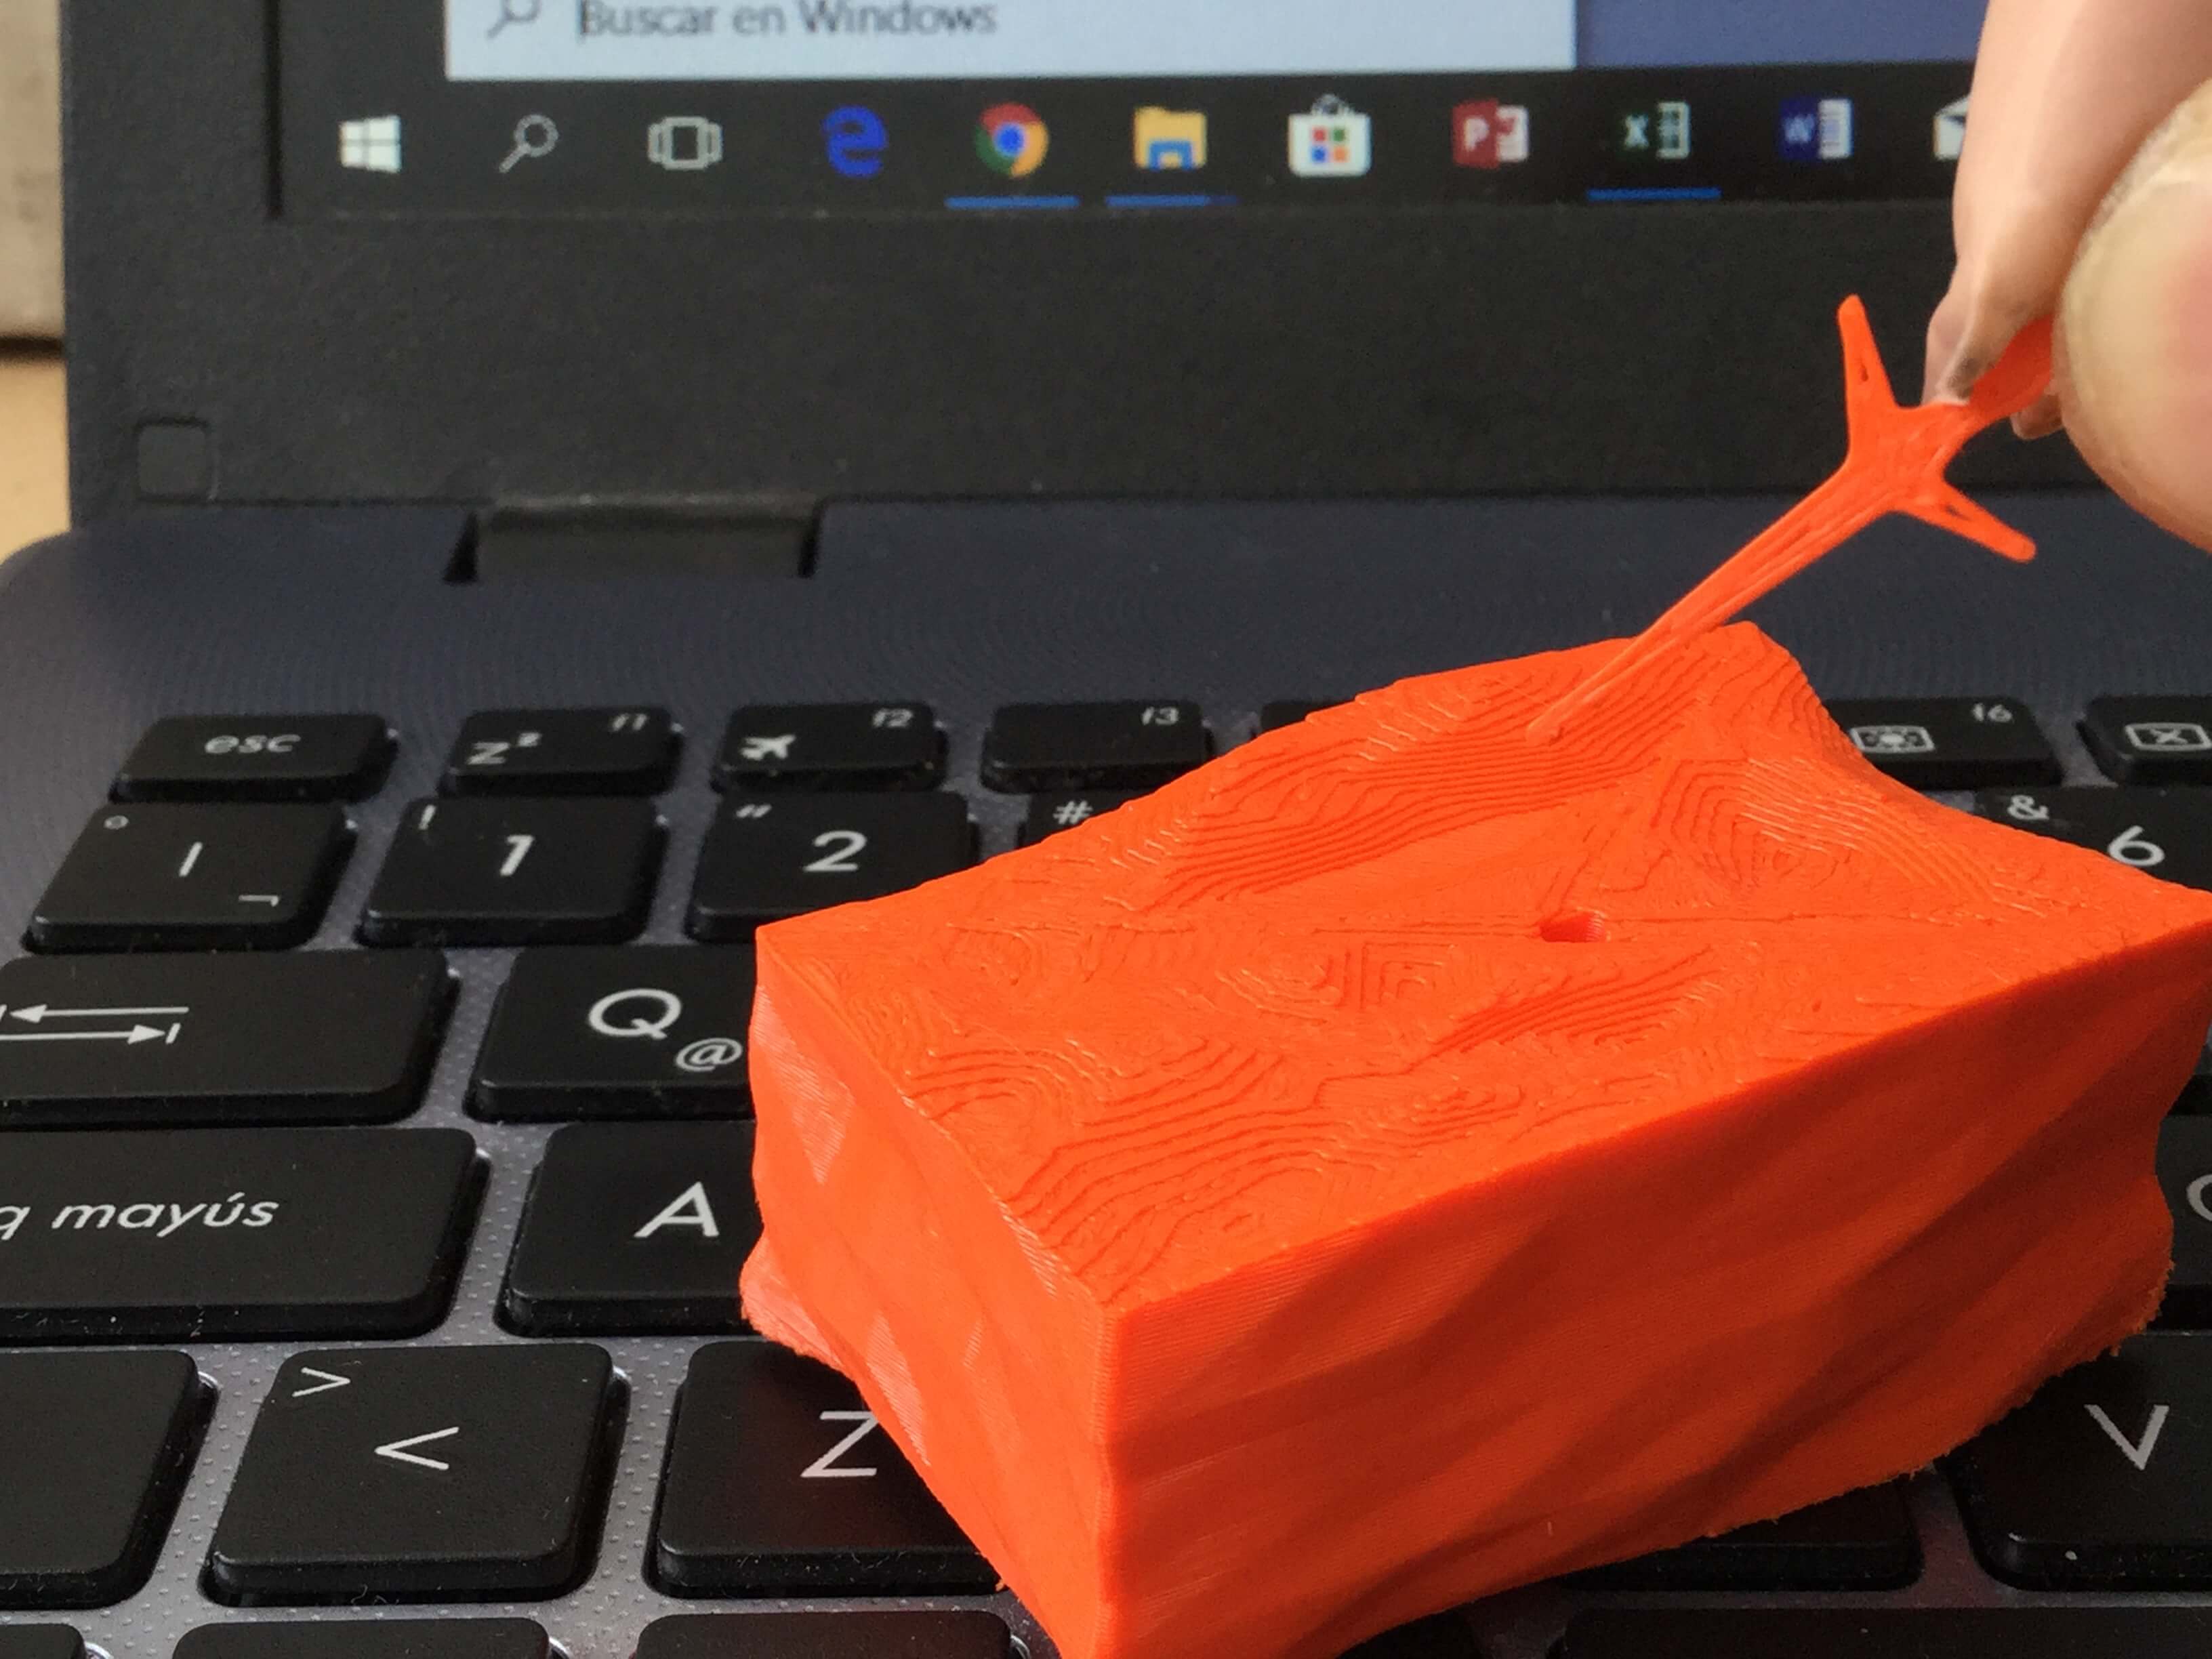
The second assignment consists of the design and prints a 3d object that can't be done by the subtractive process, like laser cutting. For the design I use SketchUp, and add two plugins, one is "eneroth fractal terrain eroder" to give a solid type rock finish, and "STL Exporter" for convert the format. Use the comand intersect > intersect with model, for joint the two pieces of my design and print as one.
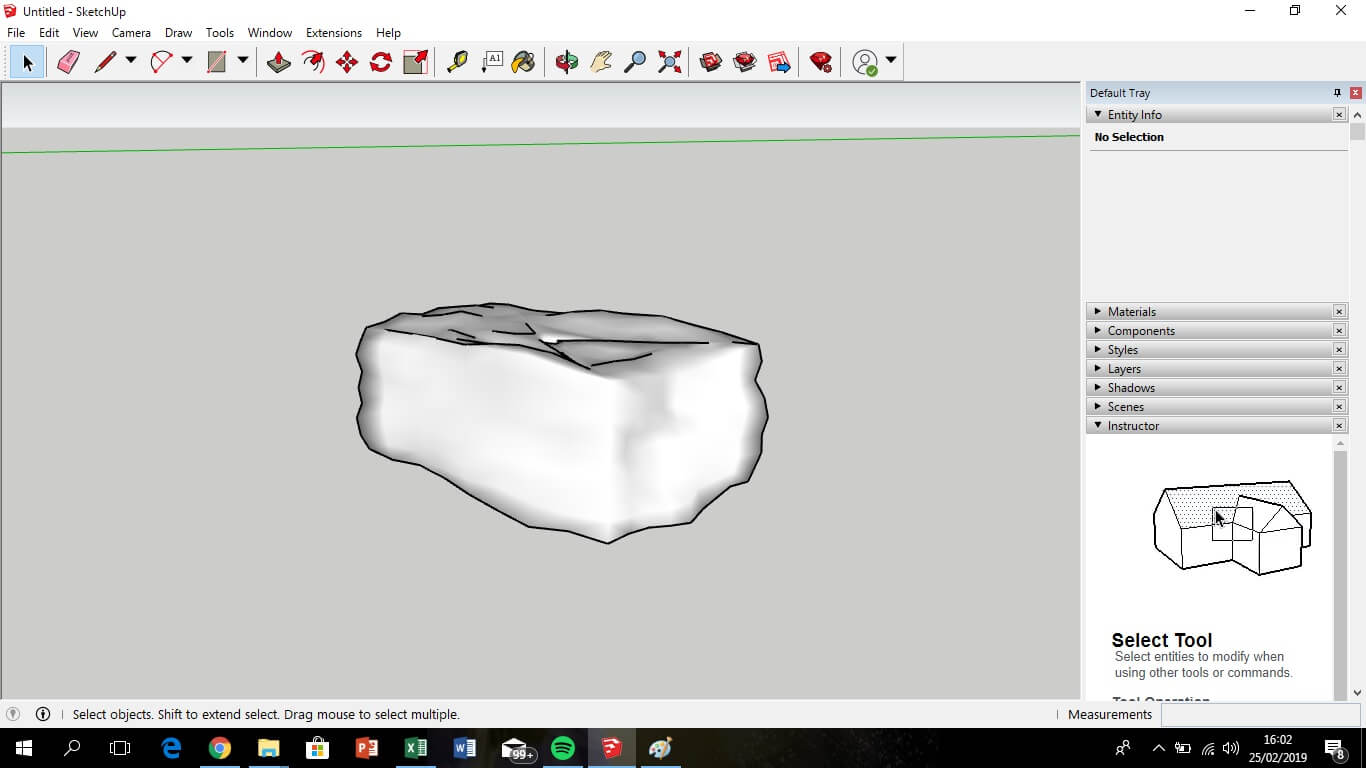


Then, load the STL. file in the Makerbot print software, but in this case, in print settings add raft and support (because the sword was in the air) and the infill was 15%.


3D scan an object
For the assignmet of scanning, i use the kinect for xbox 360 and the free software reconstructme. The step to follow was simple, before set up the device and run de software, select the custom device and press the start button, and the device starts to record. I sat on a swivel chair and rotate slowly 360°, then a colleague finish the record passing the device in a zenital way. The save as a OBJ. file.


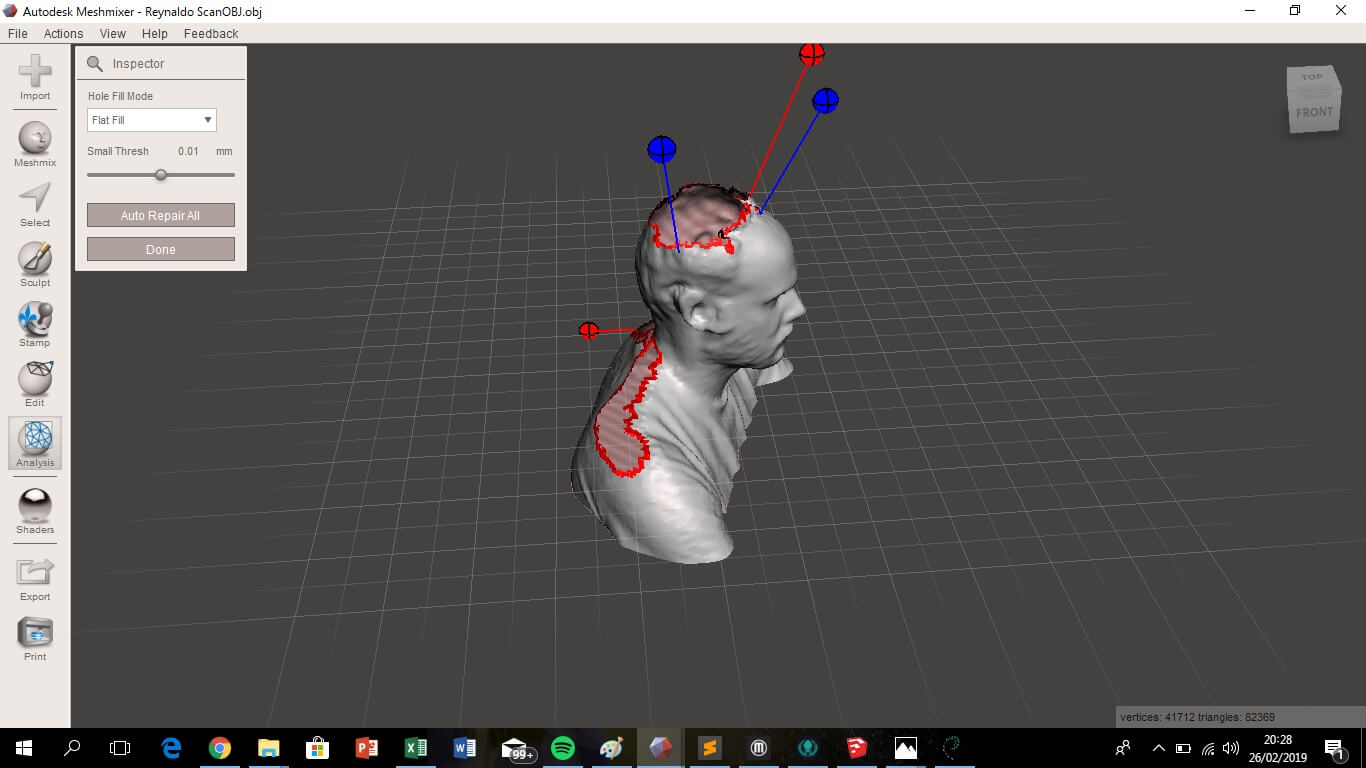
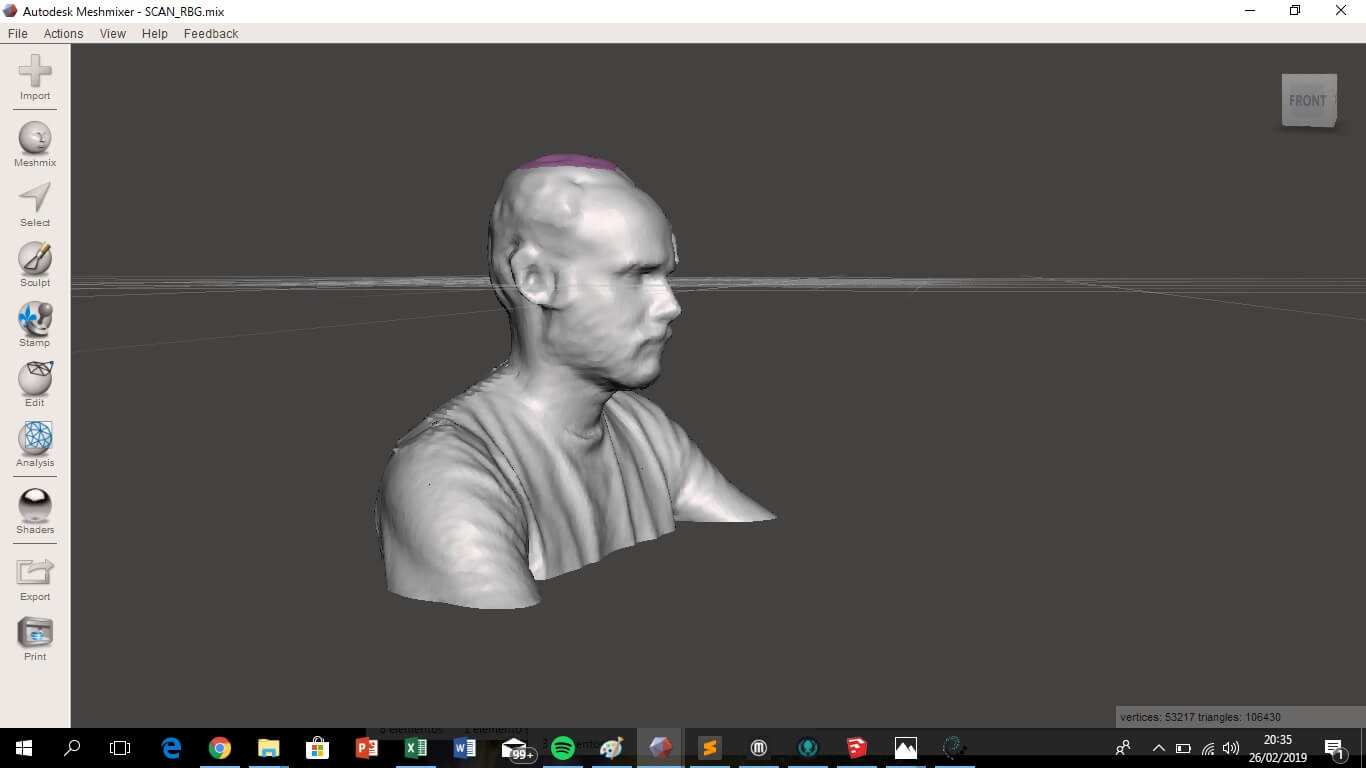
As the scan record more than necessary and did not capture some parts, some parts of the image had to be cleaned and reconstructed. For this I used Meshmixer, a free software that is quite simple. With three steps you can achieve an acceptable image, first use edit > separate shells, to separate the main image from the remainder, then edit > plane cut, to remove the excess of the main image and then analysis > inspector, to identify the holes and fill them.
Advantages and limitations of 3D printing and scanning technology
-
3d print: The advantages of 3d printing is the almost unlimited versatility of the machine to manufacture parts with very good resolution. The disadvantage is the time it takes to manufacture the piece.
-
Scanning:The advantage of scanning is that you can reverse engineer, the disadvantage is that it is low resolution, so it will only be valid for large parts.

Asignment goals
- Test the design rules for your printer (Group assignment).
- Design and 3D print an object (small, few cm3) that could not be made subtractively.
- 3D scan an object (and optionally print it).
Download: Sketchup model
Download: Repair scan 3d
Learning outcomes
- Identify the advantages and limitations of 3D printing and scanning technology.
- Apply design methods and production processes to show your understanding.
Have you?
- Described what you learned by testing the 3D printers.
- Shown how you designed and made your object and explained why it could not be made subtractively.
- Scanned an object.
- Outlined problems and how you fixed them.
- Included your design files and ‘hero shot’ photos of the scan and the final object.